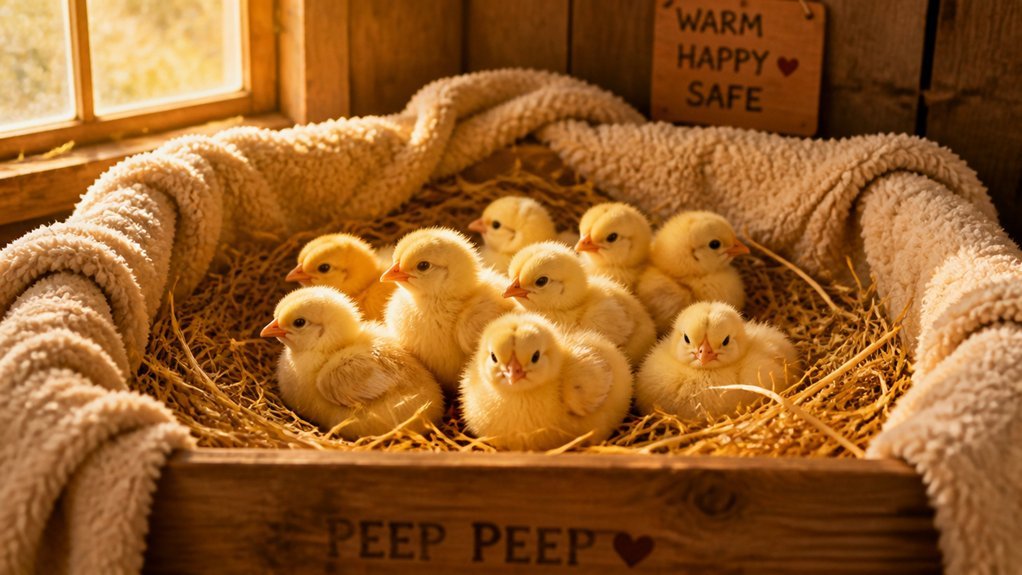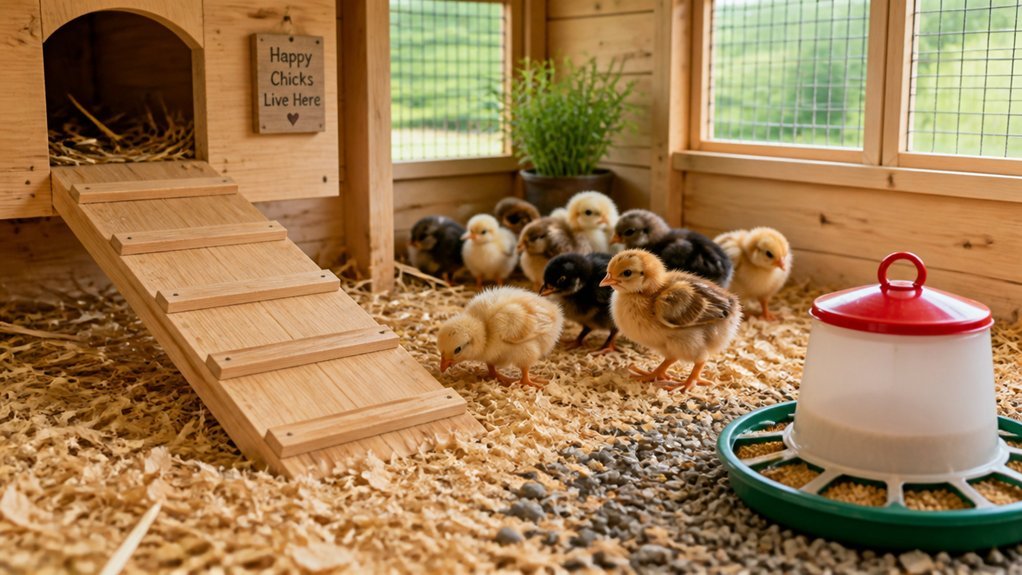

Common brooding problems include chicks chilling, overheating, poor ventilation, wet bedding, weak drinking, pasty butt, feather pecking, and uneven growth. You can fix most issues by keeping heat steady at chick level, watching behavior for huddling or panting, giving clean water and starter feed, and changing damp bedding fast. Good airflow matters, but avoid drafts. If you spot problems early and adjust quickly, your chicks usually bounce back, and there’s more to know.
Why Brooding Problems Start in Week One

In the first week, small brooding mistakes can snowball fast because chicks are most vulnerable to temperature swings, poor humidity, weak ventilation, and dirty bedding. You’re setting the foundation for growth, so any lapse quickly affects appetite, activity, and immune strength. A stable environment with proper airflow helps prevent respiratory issues and ensures consistent warmth.
When you crowd chicks, delay cleanup, or ignore their behavior, they lose energy they should use for feeding and developing. Their tiny bodies can’t buffer stress well, and that makes early setbacks harder to reverse.
You need to watch closely, because weak starts often hide until birds lag behind, peep constantly, or huddle away from the feeder. If you act early, you stop minor issues from becoming lasting problems and give your flock a steadier, healthier start.
Brooder Temperature Problems and Fixes
If your brooder runs too hot, your chicks will pant, crowd the edges, and avoid the heat source.
If it’s too cold, they’ll huddle tightly, chirp loudly, and struggle to stay active.
You can fix both problems by checking the brooder height, thermometer reading, and heat lamp output right away.
Additionally, ensure the temperature settings are correctly adjusted and the heat source is functioning properly to maintain a stable environment.
Temperature Too High
When the brooder runs too hot, chicks will spread out from the heat source, pant, and may seem restless or weak. You should lower the thermostat, raise the lamp, or switch to a weaker bulb. Check the temperature at chick level, not just near the fixture, because heat can pool unevenly. Watch behavior closely and adjust gradually. Ensure that the heat output control allows for fine temperature adjustments to prevent overheating.
Temperature Too Low
Too little heat leaves chicks huddled together, chirping loudly, and reluctant to move or eat. You’ll often see them piling under the lamp, shivering, or sleeping too much.
If you notice these signs, raise the brooder temperature a few degrees and check it again after an hour. Make sure the heat source sits at chick level and spreads warmth evenly. Remove drafts, block cold floor areas, and use dry bedding to hold heat better.
Keep a thermometer in the brooder, but also watch chick behavior because it tells you more than numbers alone. If chicks still crowd the center, add heat. When they spread out comfortably, you’ve found the right temperature.
Adjust gradually so you don’t swing from chilly to too hot. Regularly monitor the temperature with a reliable brooder thermometer to ensure optimal conditions.
How to Spot Chick Chilling

Watch your chicks closely, because chilling shows up fast. You’ll notice they huddle tight, pile into one corner, and stay unusually quiet. They may peep weakly, move less, and look puffed up as they try to hold warmth. Check their feet and legs; if they feel cool, that’s another clue. Proper brooder setup ensures consistent warmth, reducing the risk of chilling.
How to Tell When Chicks Are Too Hot
Overheating can look just as serious as chilling, so keep an eye on how your chicks behave as the brooder warms up. You’ll usually notice them panting, holding their wings away from their bodies, and crowding the brooder’s cooler edges.
Overheating can be just as serious as chilling, so watch for panting, wing-drooping, and chicks crowding the cooler edges.
They may drink more, eat less, and seem restless instead of settled. If you see these signs, adjust the heat right away.
- Watch for rapid breathing and open beaks.
- Notice chicks spreading out far from the heat source.
- Check for droopy wings and sluggish movement.
- Lower the temperature a little and observe again.
A comfortable chick moves, peeps softly, and rests without panting. Trust their behavior, not just your thermometer, and make small changes until they act calm and evenly spread. Proper thermal regulation is essential to prevent heat stress and ensure healthy development.
Poor Ventilation in the Brooder

Poor ventilation can leave your brooder with stuffy, stale air, so you need to keep airflow balanced without creating drafts. When air doesn’t move well, chicks can struggle, and you may notice more odor, dampness, and discomfort. Place vents where they can refresh the air evenly while keeping the brooder warm and safe. Using the right size and type of fan, such as a ventilation fan for coops, can ensure consistent airflow while minimizing noise and disruptions.
Airflow Balance
When airflow in the brooder is off balance, chicks can struggle even if the heat looks right, because stale air, excess moisture, and ammonia build up quickly. You need gentle, steady circulation, not a draft blasting across the floor. Aim vents so fresh air enters high and exits low, while you keep litter dry and undisturbed. Check for cold spots by feeling around chick level. Crack windows or adjust vents a little at a time. Move waterers so spills don’t block airflow. Watch chick behavior; huddling or panting tells you something’s off. Proper dust control and moisture management help maintain balanced airflow and prevent respiratory issues. Balanced air helps chicks breathe easier, stay active, and use feed well. Make small adjustments, then observe for a few hours before changing anything else again.
Stale Air Risks
Even with the heat set correctly, stale air can still put chicks at risk if the brooder doesn’t exchange air well. You may notice heavy, damp air, sleepy chicks, or wheezing when carbon dioxide and moisture build up. Poor air quality can stress their lungs, slow growth, and make litter stay wet longer. Incorporating low dust bedding options can help reduce particulate matter, further improving air quality in the brooder. You should keep fresh air moving gently through the brooder so oxygen stays available and fumes don’t linger. Watch for condensation, ammonia smells, or chicks crowding away from certain spots, since those signs point to weak exchange. Don’t seal the brooder so tightly that air stagnates. Instead, maintain a steady, clean atmosphere that supports breathing, dryness, and alert behavior. Healthy chicks stay active, eat better, and handle temperature changes more easily when the air stays fresh.
Vent Placement Tips
Vent openings should let stale air escape without creating a draft directly on the chicks. Place vents high on the brooder walls so warm, moist air rises out naturally. Keep the lower sides shielded, and don’t aim holes toward resting birds. If you use a lid, add screened gaps near the top, not over the heat source. Check airflow with your hand: you should feel movement, not a cold blast. Properly placed vents help maintain good airflow without causing draft stress, which can harm young chicks. Adjust vent size as chicks grow and odor builds. Watch bedding too; damp litter means poor air movement. Good placement keeps chicks comfortable, dry, and breathing easier.
How to Fix Wet Brooder Bedding

Wet brooder bedding usually means too much moisture from spills, leaks, or poor airflow, so you need to fix the source fast before it leads to odor, chill, or illness. Check waterers first and raise them on a stable block so chicks can drink without splashing. If a container leaks, replace it right away.
Wet brooder bedding means moisture trouble—check waterers first and fix leaks before odor and illness start.
Remove the damp bedding, scrape the floor dry, and spread a fresh, absorbent layer. Use pine shavings or chopped straw, not slippery material that packs down.
Improve airflow with clean vents and a slightly drier room, but avoid direct drafts. Recheck bedding daily and spot-clean wet spots before they spread.
If the floor stays damp, reduce water volume and widen the brooder area so moisture doesn’t build up.
Why Chicks Pile Together
When chicks pile together, they’re usually trying to get warm, feel secure, or escape a problem in the brooder. You should check their behavior and the setup right away.
If they cluster tightly under the heat source, they may need more warmth. If they crowd one corner, drafts, noise, or bright light may be stressing them. Watch for uneven spacing, because that often shows discomfort.
- Move the heat source if they huddle too closely.
- Reduce drafts and sudden sounds.
- Give them enough space to spread out.
- Keep the brooder calm, dry, and evenly lit.
You can also compare their posture and movement. Healthy chicks explore, peep, and settle without constant bunching.
Feed and Water Mistakes That Harm Chicks
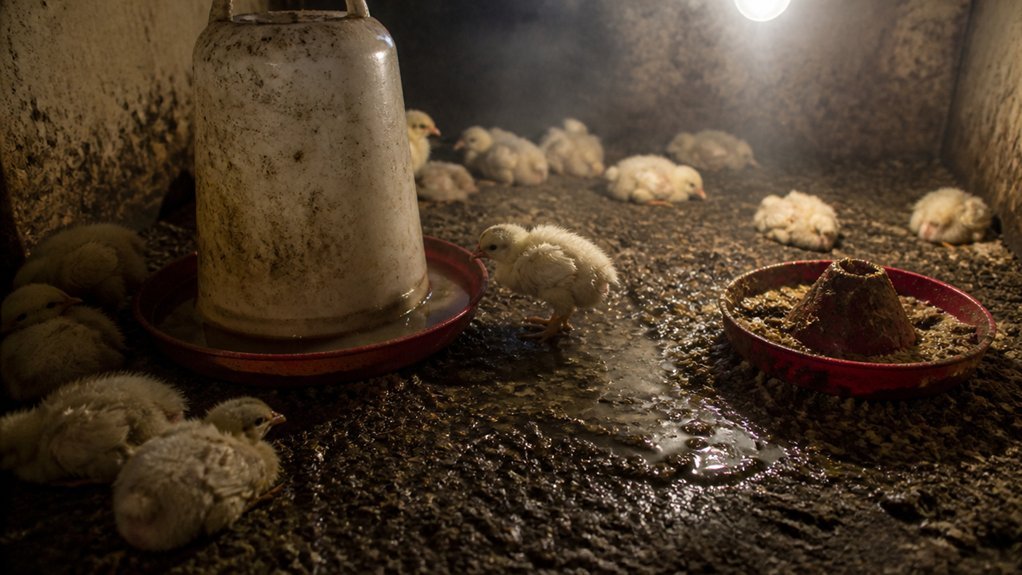
Feed and water mistakes can sicken chicks fast, so you need to check both several times a day. You should give clean, shallow waterers that chicks can reach without tipping, and you should refill them before they run dry.
Dirty water can spread illness, so scrub containers often and replace wet litter around them. Use starter feed made for chicks, not layer feed or kitchen scraps, because chicks need the right protein and minerals to grow well.
Keep feed fresh, dry, and easy to reach. If you scatter feed on the floor, you’ll waste it and invite contamination. Watch shy chicks closely, because crowded dishes can keep them from eating or drinking enough.
Pasty Butt: Causes and Fixes
Pasty butt happens when droppings stick to a chick’s vent and block waste from passing normally, and it can turn serious fast if you don’t catch it early.
Pasty butt can quickly become serious when droppings block a chick’s vent, so catch it early.
You usually see it from chilling, stress, or a dirty brooder. Check chicks twice daily, especially after shipping or a temperature swing.
Gently soften the crust with warm water, then wipe it away; never pull hard or tear skin.
Keep bedding dry, reduce drafts, and make sure chicks stay warm without crowding.
- Inspect vents during each health check.
- Use warm water, not force, to clean.
- Improve brooder sanitation right away.
- Keep heat steady and bedding dry.
Weak Chicks That Won’t Thrive
If you notice weak chicks that aren’t growing, watch for signs like drooping, huddling, or poor response to movement.
You’ll need to restore steady heat so they can stay comfortable and use their energy well. Make sure feed and water are easy to reach, because weak chicks can’t thrive if they’ve to work too hard to eat.
Identify Failure Signs
Watch the chicks closely for early warning signs that one isn’t thriving, because quick action can make all the difference. You’ll spot trouble when a chick lags behind the flock, sleeps too much, or stays tucked in a corner.
Watch for weak legs, wobbling, or trouble reaching feed and water. A chick that chirps constantly, looks dull, or ignores the group may also be struggling. Check droppings, since messy vents can point to stress or illness.
- Notice slow movement.
- Check for droopy posture.
- Watch eating and drinking.
- Look for isolation.
If you see these signs, don’t wait and assume it’ll catch up on its own. The sooner you identify the problem, the sooner you can respond before weakness turns into a bigger setback.
Restore Heat Comfort
When a chick looks weak, chilled, or slow to recover, the brooder temperature is one of the first things to check. You want steady warmth, not hot spots or drafts, so adjust the heat source and watch how the chicks settle. Spread them out if they crowd the lamp; if they avoid it, lower the heat. Use this quick guide:
| Chick behavior | What you do |
|---|---|
| Huddling tightly | Increase warmth |
| Piling under lamp | Raise heat source |
| Moving away | Reduce heat |
| Quiet, relaxed chicks | Keep settings |
| Shivering or listless | Check temperature |
Keep the floor dry and the brooder closed against cold air. When heat feels right, chicks gain energy, stand more, and recover faster.
Improve Feed Access
A weak chick can’t thrive if it has to fight for every bite, so make feed easy to reach and easy to recognize. Place shallow feeders low enough for chicks, and fill them only partway so they can peck without scrambling. Use bright, crumbly starter feed and scatter a little on clean paper to teach timid chicks where to eat.
Check that water sits close by, because thirsty chicks often skip feed. If you crowd too many birds around one feeder, spread out extra stations.
- Lower feeders to chick height.
- Use starter crumbs, not large pellets.
- Scatter feed on paper at first.
- Add more feeders to reduce competition.
Watch the run closely; slow eaters need a quiet chance to catch up each day.
Feather Pecking and Bullying
Feather pecking and bullying often start with stress, overcrowding, or a lack of space and enrichment, so you need to catch the behavior early before it spreads through the flock. Check for birds that chase, nip, or pull feathers, then separate the aggressive ones right away.
Give chicks more room, add extra feeders and drinkers, and keep light levels calm so nervous birds settle down. You can also offer safe distractions like hanging greens or chick toys to redirect pecking behavior.
If one bird keeps getting targeted, move it to a quieter group for a while. Watch daily for bare patches, wounds, or weak birds, and act fast before injuries turn serious. Consistent observation and prompt changes usually stop bullying before it becomes a lasting habit.
Brooder Cleaning Mistakes to Avoid
Keeping a brooder clean matters, but overdoing it can stress chicks and create new problems. You should clean on a routine, not every time they scatter a few shavings.
Keep brooder cleaning routine and gentle—too much fuss can stress chicks and create new problems.
Too much disturbance can chill chicks and interrupt feeding. Watch for these mistakes:
- Scrubbing with harsh chemicals that leave fumes.
- Replacing all bedding at once and removing familiar warmth.
- Letting the brooder stay wet after washing.
- Cleaning feeders and waterers so aggressively that you spill or contaminate them.
Instead, spot-clean daily, refresh bedding as needed, and dry surfaces fully before chicks return. Use mild soap, warm water, and good ventilation.
Keep hands, tools, and shoes clean too. A steady, gentle cleaning habit protects health without turning the brooder into a stressful, unfamiliar space.
Brooding Problems by Chick Age
Brooding problems often change as chicks grow, so what you watch for at day one isn’t the same as what shows up a week later.
In the first 48 hours, you may notice weak chicks, pasty vents, or poor drinking. These usually point to shipping stress, dehydration, or trouble finding feed. By week one, uneven growth, huddling, and noisy peeping can signal that some chicks aren’t getting enough warmth or access to water.
After that, you might see wet bedding, leg weakness, or feather picking as crowding and diet issues become more obvious. Older chicks can also show slow growth or respiratory signs when litter quality slips. When you match the symptom to the chick’s age, you can narrow the cause faster and respond more effectively.
How to Prevent Brooding Problems
Prevention starts before chicks arrive, because a clean, dry, well-heated brooder solves many problems before they begin.
You should scrub and disinfect the brooder, then let it dry completely. Check heat with a thermometer, and adjust the lamp so chicks can move freely between warm and cooler spots. Use fresh bedding that stays dry and never gets slick.
Give chicks clean water and starter feed from day one, and replace both often. Watch their behavior closely; crowded, loud, or chilled chicks tell you something’s wrong.
- Set up equipment early.
- Test temperature before placement.
- Keep bedding, water, and feed clean.
- Observe chicks twice daily.
Frequently Asked Questions
How Often Should Brooder Bedding Be Changed?
You should change brooder bedding daily, or sooner if it’s wet, soiled, or smells. Fresh bedding keeps chicks dry, healthy, and comfortable, and you’ll reduce ammonia buildup, pests, and disease risk.
Can Chicks Brood Outdoors in Mild Weather?
Yes, you can brood chicks outdoors in mild weather if you keep them draft-free, dry, and protected from predators. You’ll still need supplemental heat, secure shelter, and close monitoring until they’re fully feathered.
Do Chicks Need Supplemental Light at Night?
No, you usually don’t need supplemental light at night. You can let chicks sleep in darkness if they’re warm, safe, and eating well during the day. Use a small light only if they’re chilled or weak.
When Should Chicks Move to a Larger Brooder?
You should move chicks to a larger brooder once they’re crowding, feathering out, or starting to spill feed and water everywhere. If they’re pressing together or can’t stretch comfortably, upgrade now.
Is Grit Necessary for Chicks in the Brooder?
No, you don’t need grit in the brooder if your chicks eat only starter feed. You should offer grit only when they start consuming treats, greens, or anything beyond feed, so digestion works properly.
In Summary
Brooding problems can show up fast, but you can prevent most of them with a little attention each day. Keep your brooder warm, dry, and well-ventilated, and watch your chicks for signs of chilling, overheating, or stress. Clean regularly, give them enough space, and step in early if bullying starts. When you notice problems quickly and fix them right away, you’ll help your chicks grow into healthy, active birds.